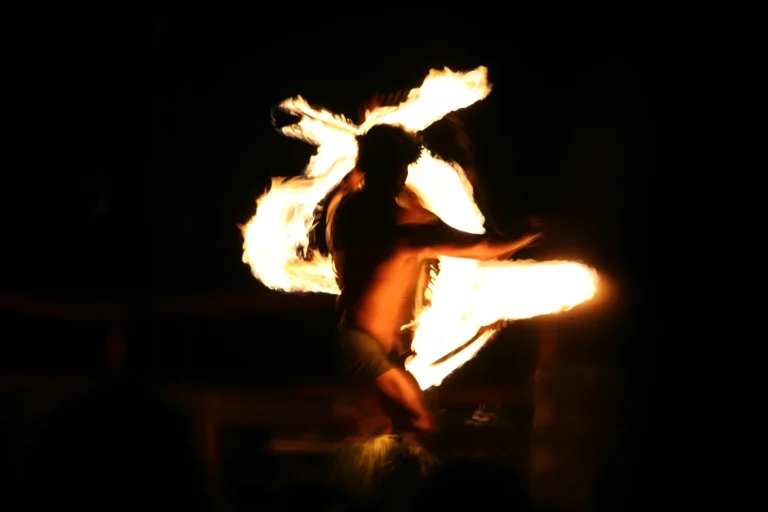
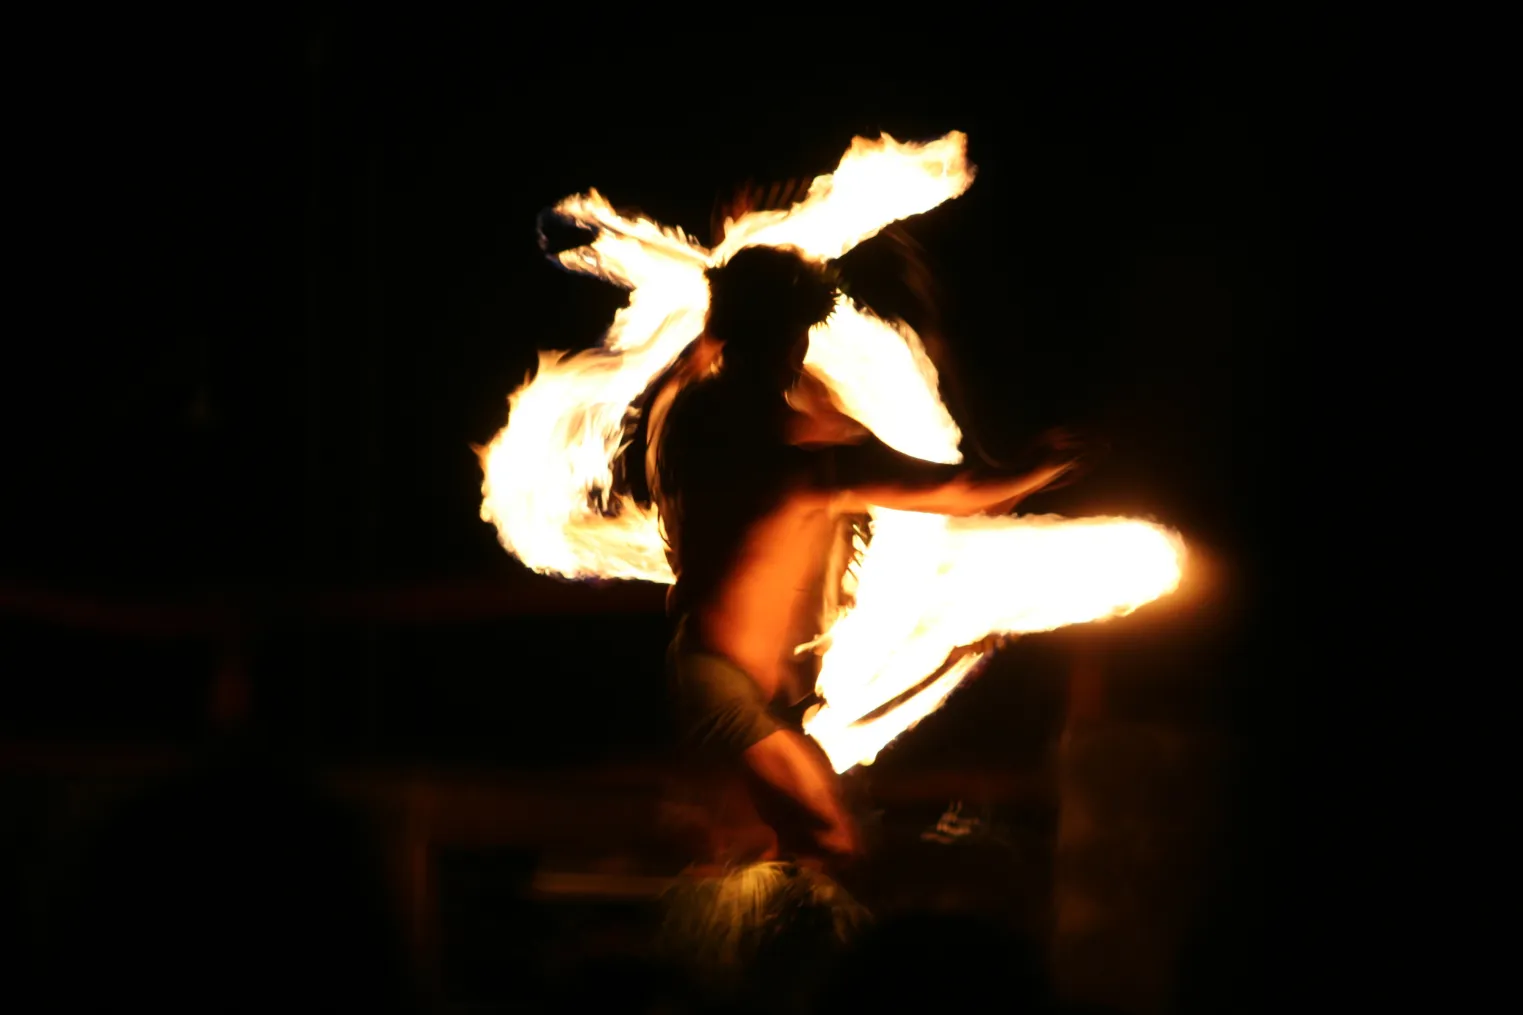
At a luau, your phone has to juggle firelight, moving dancers, and a very dark sky, so auto mode often gets confused. You’ll get better shots if you take control with Pro mode, keep ISO low, steady the phone on a tripod or table, and adjust shutter speed with care. A warm white balance helps the flames look true, and a timer cuts shake when the drums start thumping. The trick is finding the sweet spot before the best moment arrives.
Key Takeaways
- Use Pro mode, keep ISO at 100–200, and adjust shutter speed first for cleaner night shots with better shadow detail.
- For dancers or fire knife action, start around 1/60s to 1/125s; for steady firelight scenes, use 1–8s on a tripod.
- Lock focus on torch edges or subjects before the show, and set manual focus around 2–5 meters for more reliable sharpness.
- Set white balance warm at about 2800–4000K, or use Tungsten mode, to keep firelight natural and skin tones rich.
- Underexpose slightly, about –1 stop, use matrix metering, and watch highlights so flames keep color instead of turning white.
Use Pro Mode on Your Phone
When the luau shifts into that smoky blue hour and the tiki torches start to flicker, switch your phone to Pro mode and take control yourself. Skip Auto and set ISO low, around 100, so noise doesn’t sandpaper the dark sky. Choose shutter speed by movement. Start near one second for calmer moments, then go longer only when the scene turns still. For luau performances, stabilize your phone or brace it well to keep low-light shots sharp when performers are moving. Lock focus on a dancer or torch so your first time doesn’t turn mushy. Set white balance yourself too. Firelight and stage colors can fool auto and shift skin tones. If JPEG is all you’ve got, tweak highlights, shadows, and contrast before you take a picture. Use a short timer, then go back and refine what the screen shows you right away tonight.
Put Your Phone on a Tripod
Pro mode gets much easier once your phone stops moving, so set it on a sturdy tripod before the drums start and the torches throw that warm, jumpy light across the lawn. Lock your phone into a holder or cold shoe adapter, then use a 2s or 10s timer so your tap doesn’t jiggle the shot. With the phone fixed, you can drop ISO to 100 and stretch shutter speed from 1 second to 8 or even 10 seconds for cleaner low-light photos. Take a test shot, zoom in, and check sharpness. Then try 0.5s, 1s, and 2s to see where brightness looks right and movement still feels intentional. Set the tripod away from busy edges, unless you enjoy mysterious blur-bombs from passing people. If you’re shooting at Mauka Warriors, plan your setup around top photo spots and arrive before the best timing window so you can frame the lawn and stage without people stepping into your long exposure.
Frame the Scene Around Firelight
Make the fire your focal point, then place dancers, tables, or lava rock where they guide your eye back to the flames. You’ll get stronger contrast if you keep the background darker and let the warm glow shape faces instead of turning them into silhouettes. It’s a small balancing act, but when you frame it right, the crackle of the fire and the amber light do half the storytelling for you. At Mauka Warriors Luau, the Fire Knife Dance adds fast-moving flames and dramatic action that make this framing approach even more striking.
Use Fire As Focal Point
A fire pit gives your luau photo a natural center, so let the flames do the visual heavy lifting. In Pro mode, tap focus on the fire and treat it like your star performer. Use matrix metering, then pull exposure down about 1 to 2 stops so bright tongues of flame keep their color and heat texture.
Lock white balance near 2000 to 3000 K for warm orange light that feels true to the night. Start at ISO 100 to 200 and lengthen shutter speed if your phone is steady. If you’re handholding or people move, use 1/125s to 1/60s and raise ISO only as needed. A little grain beats blur. That balance gives you flame storytelling, while ambient silhouette stays alive after dark. If the luau includes an Imu Ceremony, use the fire as both your light source and cultural focal point for a more meaningful composition.
Position Surrounding Elements
Shift your position until the firelight does more than glow. You want it to guide the eye. Put brighter flames in the lower third and your performer or tiki hut in the upper third. Step away from busy corners so fewer cars and wandering elbows steal attention. Tilt your phone slightly down to catch the lit path, foreground textures, and reflections.
- Use seating rows or old walls as lines toward the subject.
- Leave some negative space so the path feels longer.
- Check frame symmetry when buildings or torches flank both sides.
- Spread visible lights around faces or walls for shape and sparkle.
You’re arranging a little corridor of light. It should feel easy, grounded, and just polished enough to impress your future self tonight. At Mauka Warriors Luau, you can take photos during the show, so use that freedom to adjust your angle between moments without rushing.
Balance Glow And Darkness
Once your lines and spacing feel right, let the fire take the lead and build the frame around its glow. Place the flames slightly off center, then use a path, palm limb, or ring of chairs to guide your eye inward. Keep some dark negative space around the pit for stronger contrast control and a sense of hush.
Use a low ISO, around 100 to 400, and longer shutter speeds if your phone allows tripod mode. That helps preserve dynamic range, so the flames keep texture instead of turning into a bright blob. Meter near the midtones by the fire, then trim highlights and shadows for better ambient blending. Lock white balance around 2500K to 3500K so the amber light stays warm, not weirdly blue. Silhouettes at the edges add scale, too. At cultural shows, keep your framing discreet so the photo respects the performance as much as the firelight.
Start at ISO 100 or 200
Start your luau night photos at ISO 100, or 200 if your phone runs cleaner there, so you keep the dark sky smooth and the torchlit details crisp. You’ll get the best color and texture this way, but you’ll also need a tripod or a very steady rail when dancers spin and fire cracks in the dark. At Mauka Warriors Luau, the nighttime setting at Coral Crater makes low-ISO shots especially effective for preserving the evening ambiance. If you’re shooting handheld, bump ISO only as much as you need for a sharp frame, because a little noise beats a blurry hula every time.
Minimize Noise First
Because luau nights mix deep shadows with bright torchlight, your cleanest move is to keep ISO at the lowest native setting your phone’s Pro mode offers, usually 100 or 200. That gives sensor calibration and noise profiling less trouble, so dark skies stay smoother and torch edges keep better dynamic range.
- Use a tripod, rail, or table so longer shutter speeds don’t smear dancers.
- If Pro mode saves JPEG only, lean on shutter speed, not extra ISO.
- Watch highlight and shadow sliders to hold flame detail and costume texture.
- Check each frame for grain in black lava, palms, and glossy lei leaves.
You’ll hear drums, see sparks, and still bring home cleaner files that look rich, not crunchy, when midnight editing begins back home. If you’re also capturing clips between stills, follow video tips so you film the best luau moments and skip distracting footage.
Raise ISO Only If Needed
How high should you push ISO when the torches flare and dancers sweep across the stage? Start at ISO 100 or 200. Your phone’s small sensor stays cleaner there, with less grain and less sensor heat impact. Raise ISO only when slower shutter speeds blur hips, hands, or your own handheld frame despite stabilization. If you have best seats with a clear stage view at Mauka Warriors Luau, you can often keep ISO lower because you need less digital zoom.
| ISO | When to use | Watch for |
|---|---|---|
| 100-200 | Tripod, timer, calmer moments | Clean detail |
| 400-800 | Faster movement, incremental exposure checks | Noise, detail loss |
Use small jumps and trust your real time preview. Zoom to 100 percent and stop when faces soften. If motion still streaks, pair a modest ISO bump with a slightly faster shutter and wider aperture. That balance keeps firelit skin warm, drums sharp, and the night pleasantly atmospheric.
Choose a Shutter Speed That Fits
Dial in your shutter speed to match the scene, and your luau photos will instantly feel more intentional. At night, you’ll usually get the cleanest results by keeping ISO low and letting the shutter do more work. That’s where shutter experimentation pays off.
- Try 1/10s to 2s handheld near bright torches.
- Use 1s to 8s on a tripod for warm glow.
- Pick 1/60s to 1/125s for fast action.
- Review shots at 100% to judge creative blur and ambient motion.
Manual or Pro mode gives you a single-shot look, so you can skip Night mode stitching. Choose longer exposures for natural fire trails. Go faster when you want crisp stills, even if ISO climbs a bit. Your ears hear drums. Your shutter decides how for you. If you’re shooting through the full Mauka Warriors Luau, expect changing light conditions over the course of its duration.
Lock Focus on Dancers or Fire
Lock focus before the drums pick up and the fire starts sketching bright arcs across the dark. Use Pro mode, or tap and hold to lock autofocus, then set focus for the dancer zone, usually 2 to 5 meters away. That pre focus practice stops hunting when the light drops and bare feet start moving fast.
If your phone offers manual focus distance, set 2 to 4 meters for dancers or infinity for distant fire. Use the flame edge as your target, since autofocus loves bright highlights. Watch your focus lock indicators. Pair locked focus with a shutter so focus doesn’t turn into blur. If you know your luau seating section, choose a focus distance that matches how far your row sits from the performance area. Learn your manual focus shortcuts. Recheck after reframing, then shoot a short burst and zoom in to confirm details.
Keep White Balance Warm and Natural
You’ll get better luau night photos when you keep white balance warm, so skin stays rich and natural under torchlight instead of turning pale or oddly blue. If your phone lets you set Kelvin, start around 3000 to 4000 K, and don’t trust Auto WB too much because it can shift from shot to shot like an overeager stagehand. A small move toward magenta can also help if venue lights look a little green, and locking that setting keeps the whole scene glowing the way it felt. Since entry may include security screening, set your camera controls before arrival so you can move through smoothly and start shooting sooner.
Warm Skin Tone Balance
Because luau light mixes fire glow, string bulbs, and a little night sky blue, your phone often cools the scene too much and makes faces look flat. Set white balance a touch warmer than auto. Aim near 3500 to 4500K, or try Tungsten around 3200 to 4000K if your phone offers it. Then lock AWB so skin undertones stay steady from shot to shot.
If you arrive early for a pre-show visit to Coral Crater Adventure Park, your eyes can adjust to the island evening light before the luau starts, making it easier to judge warm skin tones accurately.
- Use custom Kelvin before trusting portrait presets.
- Watch skin undertones, not tablecloth whites.
- Skip heavy ambient gels unless you test first.
- Protect midtones, then lift shadows slightly.
If you shoot JPEG only, keep warmth in camera by saving those midtones. Use ISO 100 to 400 with a tripod when possible. Less noise means cleaner color and smoother cheeks. Later, add only a small warmth nudge in post.
Avoid Cool Color Casts
When torches flicker and string lights glow, your phone often tries to “fix” the scene and washes that warm luau color into a chilly blue. Set white balance warmer, around 2800 to 3500K, so torchlight calibration keeps firelit skin golden. In Pro mode, avoid 6000K-plus settings. For JPEGs, lock ambient warming before you shoot, because color cast removal later can thin detail. Tap a neutral spot lit by the same flames to keep every frame consistent. This simple adjustment also helps you avoid one of the most common luau night mistakes by preserving the natural firelit mood instead of letting your phone cool it down.
| Scene | Wrong feel | Better feel |
|---|---|---|
| Torch dancer | Pale, cold | Honey glow |
| Lei toast | Flat smiles | Sunset warmth |
| Fire pit | Blue shadows | Cozy sparkle |
The right warmth lets drums feel closer, silk shirts look richer, and the whole beach seems alive instead of lit by a sad refrigerator bulb.
Use Auto WB Carefully
Although Auto WB can be handy, it often gets jumpy at a luau and cools torchlight into a color that feels more parking lot than beach feast. You’ll get better results if you use manual override and keep white balance warm, around 3000 to 4000 K. At an evening lūʻau with live music, hula, and outdoor seating under the stars, this warmer balance helps the scene stay true to the experience.
- Pick Tungsten or Incandescent if your phone skips Kelvin.
- Try 3200 K first, then compare 2800 to 3800 K by eye.
- Watch mixed lighting from fire, LEDs, and moonlit tables.
- Make preview adjustments if faces look gray or flames lose orange.
If you shoot JPEG only, set WB in camera and leave it slightly warm. Natural skin and glowing torches beat icy accuracy every time. That small tweak keeps hula costumes rich, leis lively, and the whole night believable.
Lower Highlights to Hold Fire Detail
To keep the fire looking like fire and not a white blob with attitude, pull your phone’s highlight slider down or dial exposure compensation to about minus 1 stop before the dancer swings the torch. That small move gives you real highlight preservation in a scene full of fast orange bursts and sizzling white cores.
At the Mauka Warriors Luau, these dramatic fire moments are part of a unique island performance, so dialing exposure down early helps you stay ready for sudden bursts of flame. Keep ISO low, around 100 to 200, so your sensor keeps more headroom. Use a shorter exposure, roughly 1/100 to 1/10 second depending on brightness and whether you’ve braced the phone, to freeze flame texture and avoid hot spots. If your phone shows a histogram or clipping warning, nudge settings down until the right edge behaves. No raw? Zoom to 100 percent and check embers. Even with dynamic range stacking, localized recovery works better when detail survives first.
Brighten Shadows Without Extra Noise
Often, the cleanest way to open up the dark grass skirts, faces, and palm fronds around a luau isn’t to crank ISO, but to keep it at the minimum your phone allows, usually ISO 100, and let the shutter stay open longer. In Pro mode, try 1 to 10 seconds and choose the shortest exposure that brightens shadows without blurring dancers or firelight. If RAW isn’t available, use in-camera sliders before capture. Torch glow stays rich at night. If you’re photographing the bar or tables, note which included drinks come with the Mauka Warriors Luau so labels and glass details stay easy to identify in low light.
At a luau, cleaner shadows usually come from ISO 100 and a longer shutter, not higher ISO.
- Use a steady surface for cleaner shadow recovery.
- Nudge Shadows up slightly, and trim Highlights a touch.
- Zoom into the preview and compare ISO 100 at 1s versus 2s.
- Keep matrix metering on, set warm white balance, and finish with local dodging and noise aware sharpening.
Use a Timer to Avoid Shake
Once you’ve lowered ISO and stretched the shutter for richer shadows, the next small fix is just keeping your phone perfectly still when you take the shot. On a tripod, use a 2-second timer for exposures past 1/10s. It stops finger pressure from softening fire dancers and tiki lights when you zoom in. If you’re carrying a tripod to the luau grounds, remember that walking at Mauka Warriors Luau can affect how quickly you get set up before the show begins.
| Timer | Best use |
|---|---|
| 2s | Quick vibration dampening |
| 10s | Step clear or avoid nearby bumps |
| remote shutter | Handy backup |
Try shutter delay experiments in Pro mode. If you see 2s, 8s, or 10s shutter times, keep ISO low and let the timer handle touch blur. Handheld action is different. Skip the delay and raise shutter speed instead. That tiny pause feels oddly luxurious while drums thump and palms flicker in the warm night breeze.
Take Several Shots and Compare Them
Bracket your shot like a little night experiment and take a few versions before the dancers move on. In Pro mode, keep ISO near 100 and change one setting at a time. Use your tripod and a 2s or 10s timer so each frame matches. Then shoot 1/10s, 1s, 2s, and 8–10s to see what the torches and hula hands do.
- Start with one scene and vary composition.
- Compare focal lengths before the crowd shifts.
- Test burst mode for quick moments between poses.
- Zoom in and pick the frame with the best balance of motion, color, and bright firelight.
You’ll learn faster by comparing than by guessing, and your phone will surprise you in the island dark, occasionally like a tiny tiki scientist tonight. If you still have questions while experimenting, keep a note of your results alongside common luau questions so you can connect what you see in each shot with the overall Mauka Warriors Luau experience.
Fix Blur, Noise, and Overexposure
If your luau photos look soft, grainy, or blown out around the torches, start by steadying the phone and simplifying the problem. Use a tripod and a two second timer, or try tripod alternatives like a rail, table, or sandal. In Pro mode, keep ISO at 100 and lengthen shutter speed instead of pushing ISO and inviting noise. Test exposures from 0.5 to 10 seconds, then zoom in to check sharpness.
When ambient motion enters the frame, shorten exposure and raise ISO only a little. Night mode stacking can help. To tame torch glare, lower EV or highlights, use matrix metering, and trim exposure from two seconds to one or half. If you shoot JPEG, reduce highlights, lift shadows, and try creative silhouettes by fire. If you know when the luau begins, arrive early to test your exposure settings before the show starts.
Frequently Asked Questions
Can I Use My Phone’s Flash During a Luau at Night?
Yes, you can use your phone’s flash at a luau, but you should check rules first, keep subjects close, use diffuser, lower power to avoid glare, and reserve it for fill so you preserve ambiance.
Which Phone Lens Works Best for Wide Luau Group Photos?
You’ll get the best luau group photos with your main sensor if you can step back; otherwise use ultra wide for tight spaces. Avoid telephoto portrait at night, and keep faces centered to reduce distortion.
How Do I Protect My Phone From Sand, Smoke, or Humidity?
Like a lifeguard guarding shorelines, you’ll shield your phone with sandproof cases, moisture barriers, and smoke protection; wipe grit off quickly, avoid opening ports outside, and dry it with silica gel after humid air exposure.
Should I Shoot in RAW or JPEG for Luau Photos?
Yes, Shoot RAW when you can stabilize your phone because you’ll Preserve Highlights, recover shadows, and better Capture Atmosphere. Choose JPEG only if you’re shooting handheld, sharing instantly, or need faster processing for moving dancers.
What Apps Are Best for Editing Luau Night Photos Later?
Your best editing apps are, wait for it, Lightroom Mobile for RAW control, Snapseed Tools for quick selective fixes, and VSCO Presets for moody style. If noise gets nasty, you’ll also love DxO or Topaz later too.
Conclusion
With these settings, you’ll turn a tricky luau night into a pocket-sized light show. Keep ISO low. Let shutter speed do the heavy lifting. Steady your phone like it’s guarding treasure, then use the timer and shoot a few versions. Watch the fire glow amber, the leis catch texture, and the dancers blur just enough to feel alive. If one frame misses, no problem. The next might look like the Pacific itself stopped to pose.