About 80 percent of your best luau photos happen before the first drumbeat, when the light turns soft and the crowds haven’t filled every frame. If you show up 45 to 60 minutes early, you can catch tiki statues, lei greetings, and the imu steam while sunset warms the palms. Pick your stage angle before dusk, then save your fastest settings for the fire knife. Stay a little longer, too, because the strongest shot might come right at the end.
Key Takeaways
- Arrive 45–60 minutes early to check in fast, beat shuttle crowds, and secure front-row spots for pre-show, imu, and stage photos.
- Stand near the imu 15–30 minutes before sunset for unobstructed reveal shots and candid reactions during the pork unveiling.
- Shoot during check-in and pre-show golden hour, about 45–20 minutes before sunset, for warm light and clean portraits.
- Choose front-row center for fire-knife shots, or stand slightly off-center for fewer flares, better silhouettes, and clearer sparks.
- Use continuous AF, burst mode, and at least 1/1000s shutter for fire-knife action; for phones, use Night or Pro mode and brace steadily.
Arrive Early for Better Luau Photos
If you want the best luau photos, get there by car 45 to 60 minutes before showtime. Arrive early and you’ll beat most shuttle guests to the best pre-show photo spots. Snap the eight-foot tiki statue and staged cast backdrops before the area fills up.
Check in fast for your wristband and lei, then head down early to claim a front-row place for the imu reveal. Following the Mauka Warriors Luau Check-In process quickly gives you more time to photograph the pre-show activities before crowds build. You’ll also have room to photograph tattoos being drawn, coconut-shredding demos, and kids practicing hula without a forest of heads in the frame. If you wander a bit, you’ll even catch a gorgeous view of Honolulu. Early birds really do get the pig, steam, and fewer elbows in every shot. That alone makes the drive feel very smart.
Shoot Golden Hour at Check-In
Often, the best light at Mauka Warriors Luau shows up right when you’re checking in. Arrive early if you’re driving so you beat the shuttle crowd and catch golden hour in the waiting area. About 45-20 minutes before sunset, the 8-foot tiki photo spot glows with warm color. Place your subject with the sun behind them for soft rim light, then use the tiki statue or bar as foreground interest. A reflector or fill flash helps lift shadows on faces and every lei. If you want a moodier frame, turn toward the imu area just before sunset and silhouette cast members against the backlight. Knowing the seating sections ahead of time can also help you plan where to move next for unobstructed sunset angles. Claim your spot early because space disappears fast. Even the drinks catch a little sunset sparkle, which feels wonderfully cinematic.
Capture Lei Greetings on the Walk Down
Timing matters on the walk down, because the lei greeting happens fast and the light fades by the minute. Arrive early and check in so you can wait near the top of the descent.
- Stand off to the side for a clean view of the fresh flower lei greeting and smiling greeters.
- If you spot a kukui nut lei greeting, frame the hands and textures at 35–50mm.
- Bring a fast lens (f/2.8) or use low-light mode as sunset dims.
- Use burst mode because expressions shift quickly and leis land in seconds.
You can take photos during Mauka Warriors Luau, so be ready before the greeting begins to avoid missing the best candid moments.
You won’t have room to back up, so stay nimble and listen for laughter and welcomes. Those tiny details make the moment feel vivid when you review photos later.
Choose Your Stage Angle Before Sunset
Before sunset, you’ll want to lock in your angle so the stage, sky, and mountain backdrop all work for you instead of against you. If you can grab a front-row spot or arrive early, try standing slightly left of center on the walk down and watch how the lowering sun adds warm depth behind the performers. For the best seats, prioritize front-row or slightly elevated spots that keep the full stage and mountain backdrop in view. You can also scout during the pre-show and Serenaders set, then test your framing before the fire-knife finale starts throwing sparks and fast motion into the mix.
Sunset Side Positioning
As the light starts to soften, head for the left, or makai, side of the luau grounds about 10 to 15 minutes before the imu revealing. This sunset side positioning gives you warm backlight for the imu disclosure and a golden rim light around dancers.
- Arrive early if you’re driving. Front-row space here fills fast before shuttle guests roll in.
- Stand mid-ground if you use manual settings. Meter for highlights so the sky glows and faces stay visible.
- Step slightly uphill on the descent path for wide views with the Waianae mountains and colorful horizon.
- For the finale, shift a few feet off center. You’ll cut lens flare, keep strong silhouettes, and still catch the fire knife sparks without staring straight into the sun.
If you’re bringing a car, review the parking guide before you go so you can reach the grounds early enough to claim a strong sunset-side photo position.
Stage Depth Planning
Once the sky starts to warm, pick your stage angle and stick with it so you’re not scrambling when the imu disclose begins. Front-row seating gives you low, clean sunset lines. Mid-section, 10 to 20 feet off-center, adds motion and faces without warping. Back rows frame the whole ensemble without losing sunset depth.
| Spot | Best for | Lens |
|---|---|---|
| Mo’i Royal | low sunset performers | 24-70mm |
| Koa Classic | wide-stage panoramas, imu disclosing | telephoto zoom |
Arrive early before shuttle guests flood in. Since the luau duration runs long enough for changing light, plan your shooting sequence from pre-sunset portraits through the imu and main stage sets. Lock exposure 20 to 30 minutes before sunset. If steam and smoke matter most, stand a few feet left or right of the imu line. You’ll dodge heads, keep golden light, and still catch reactions. Pick one plan and let the drums do the rest nicely.
Find the Best Portrait Spots Early
If you want the strongest portraits at Mauka Warriors Luau, you’ll do yourself a favor by scouting key spots early. Start at check-in for a clean shot by the towering tiki, then move fast to the tattoo and lei stations while the artists still have breathing room and the backdrops feel open. Before sunset, claim a front-row view by the imu pit so you’re ready when the light turns warm and everyone else suddenly has the same idea. Since entry includes security screening, arrive a little early so bag checks or line delays don’t cut into your best photo window.
Check-In Tiki Photos
Arrive early and make the check-in tiki area your first photo stop, especially if you’re driving and can beat the shuttle guests to the line.
- Show your ID, grab your wristband, and head down with your leis still fresh for a crisp portrait by the 8-foot tiki statue.
- Aim for check-in just before sunset. That golden-hour glow softens faces and gives the carved wood a warmer, richer look.
- Use open sky as your light source, or bring a small reflector. You’ll dodge harsh shadows and keep skin tones even.
- Take your posed shots first, then circle back for candid moments while Hawaiian music drifts through dusk and the waiting area still feels calm.
This early stop fits naturally into the arrival to finale flow of the Mauka Warriors Luau and helps you capture portraits before the evening transitions into the next activities.
You’ll thank yourself when later arrivals stack up behind the ropes.
Tattoo And Lei Backdrops
Scope out your portrait spots early, and you’ll have first pick of the luau’s best backdrops before the crowds spill in. Drive in before shuttle guests and head for the 8-foot tiki statue or bar framed by tiki installations and soft gold light. If you’re planning outfit changes or family group shots, note the nearby restrooms and facilities so you can move quickly between portraits without missing the best light.
| Spot | Best use |
|---|---|
| Tiki statue | Dramatic lei portraits |
| Bar area | Warm glowing carved-wood texture |
| Open-air tattoo station | temporary Polynesian-style tattoos |
Use your wristband strategically. Mo’i gets close flower leis. Ali’i suits kukui nut details. Koa works for shell lei portraits. Just before sunset, pair leis and ink near the imu pit for warm light, steam, and banana-leaf texture. Bring a 50mm to 85mm lens, and ask for reserved seating with clean backgrounds of performers and carved props behind you whenever possible.
Imu Front-Row Timing
Usually, the best imu portraits go to guests who think about timing before they think about settings.
- Arrive early and check in fast. You’ll have your best shot at front-row seating for the imu presentation, which happens just before sunset and pulls a crowd downhill.
- If you have the Mo’i Royal package, use it. Those assigned spots give you the cleanest angle.
- Get near the imu 15 to 20 minutes early. The space is tight, and that buffer protects your portrait shots from stray heads and elbows.
- Work the golden light. Bring a fast 35 to 50mm lens or stand slightly off to one side if front row disappears. Steam, crackling leaves, and the pork reveal still look terrific in your frame at dusk.
This moment is part of the Imu Ceremony, so expect the crowd to gather quickly as the presentation begins.
Shoot the Best Pre-Show Activities First
Start with the pre-show, because some of the best photo moments happen before the main program even begins. If you drive in early, you’ll beat the shuttle crowd and get cleaner frames at the tiki statue, tattoo tables, and coconut-shredding demo. During check-in, photograph headband weaving, kava tasting, and shave ice while people are still moving lightly through the space and the light stays soft.
Since this is a nighttime luau, arriving before sunset also helps you capture the transition from soft ambient light to the more dramatic evening atmosphere at Coral Crater. Then chase movement. The imu demonstration draws attention fast, so claim a close spot before the group stacks up behind you. For fire-knife practice, use a faster shutter speed and stay near the lesson area for candid coaching moments. When kids hop onstage for hula, go wide and catch the audience smiles, props, and a few parent faces too.
Get the Mauka Warriors Imu Shot Early
Head over to the imu area early, because this is one of those photo moments that disappears fast once the crowd packs in.
- Drive in early if you can. You’ll beat shuttle guests and improve your odds of front-row viewing for the imu presentation.
- Get there 20 to 30 minutes before sunset. You’ll catch steam, scent, and that warm golden-hour light on the banana leaves.
- Wear comfortable shoes and keep your wristband visible. When your color is called, move quickly and claim your angle.
- Pack a low light lens, ideally 35 to 50mm or f/2.8 zoom. Expect tight space, limited angles, and a few elbows. A small monopod helps, but hand off bulky gear before the reveal when the steam starts curling upward.
If the forecast looks shaky, check the luau’s rain policy before you go so you know what to expect if showers roll in.
Photograph the Buffet Before the Lines
If you want the buffet to look abundant instead of busy, arrive early and use that pre-show window before the shuttle crowds roll in. Drive yourself if you can, then check your colored wristband zone right away. PA announcements call groups in tiers, so shoot the buffet during the lull before your band gets called. Start with buffet style and made, then move tight for kalua pork, pineapple BBQ chicken, purple Okinawan sweet potatoes, and taro rolls while the trays still look full. Just before sunset, stake out the imu pig revealing for steam and plank-to-plate shots. Then swing by the tiki-ringed bar near check-in for shave ice and cocktails before someone adopts them for their table. You can also ask about second helpings after your first plate if you want extra food shots later in the evening. Fast. Clear. Delicious. Too tempting to wait.
Catch Candid Moments During Dinner
Once you’ve photographed the buffet at its fullest, keep your camera up and watch what happens when dinner shifts from display to reaction.
- Grab a seat near the imu revealing area or claim a front-row table before sunset. You’ll catch candid reactions when the steam rises and free samples appear.
- Stay close when wristband colors are called. Guests brighten as they taste kalua pork, chicken with pineapple BBQ, and fresh pineapple.
- Drift by the tiki-ringed bar and shave ice stand. Mai Tais, kava, and bright tongues create easy smiles.
- During intermission, circle the dining room, tiki statue, and tattoo station. Toasts, browsing, and quick chats with staff often produce your most natural frames. Tip cash, and people relax faster, which quietly improves every photo.
If you’re shooting with older family members, choose a table with comfortable seating and minimal walking so they can stay relaxed while you wait for candid dinner moments.
Set Your Camera for Night Shots
As the torches flare and the drums get louder, your camera settings start doing the heavy lifting. Open your lens to f/1.8 through f/2.8, keep ISO at 3200 or below, and set shutter speed to at least 1/250s so fire-knife action stays crisp. Shoot RAW, then dial in a custom white balance around 3200 to 4000K to hold onto warm torchlight and the stage’s gold glow during the finale. Switch to continuous AF and burst mode, and meter on the brightest flame with spot or center-weighted metering to protect highlights. If you’re using a phone, try Night or Pro mode, tap exposure onto the performers, and brace against a railing. A front-row seat also helps by clearing heads and wandering hands from your frame. For video, follow what to film guidance so you capture standout luau moments and avoid cluttered, less memorable shots.
Time Your Luau Dance Photos
Often, the best luau photos come down to timing more than gear, so watch the show’s rhythm and move early.
- Drive and arrive early so you can catch pre-show rehearsals and the kids’ hula lesson before the shuttle crowds roll in.
- Claim a front-row spot for the imu pig revelation just before sunset. Steam, golden light, and nearby dancers create rich silhouettes.
- During the Serenaders’ live set, focus on hula storytelling. Warm stage light flatters costumes and gives faces a softer glow.
- Stay ready mid-show when Cousin Jerry invites guests onstage. Then hold your spot for the fire-knife finale, when energy rises, torches flare, and the whole night feels one beat louder. You’ll hear drums thump, cameras click, and cheers bounce off the palms.
For sharper evening images, switch to your phone’s night photo settings before the torches and stage lights become the main light sources.
Shoot Fire Knife Performers Without Blur
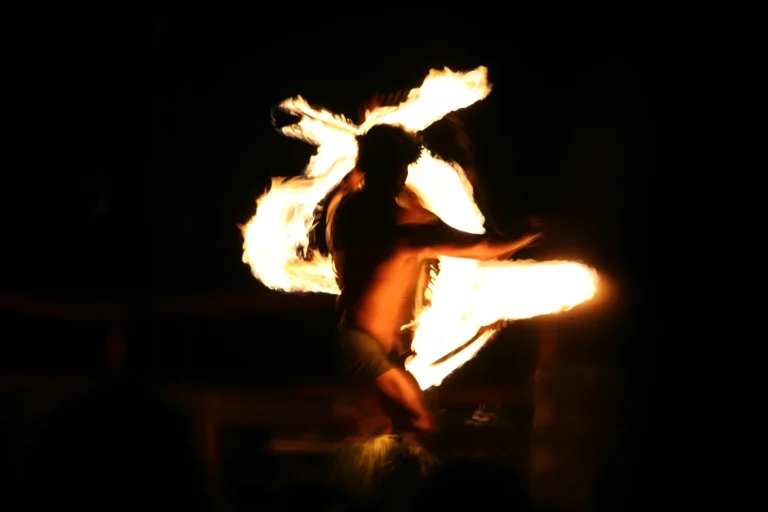
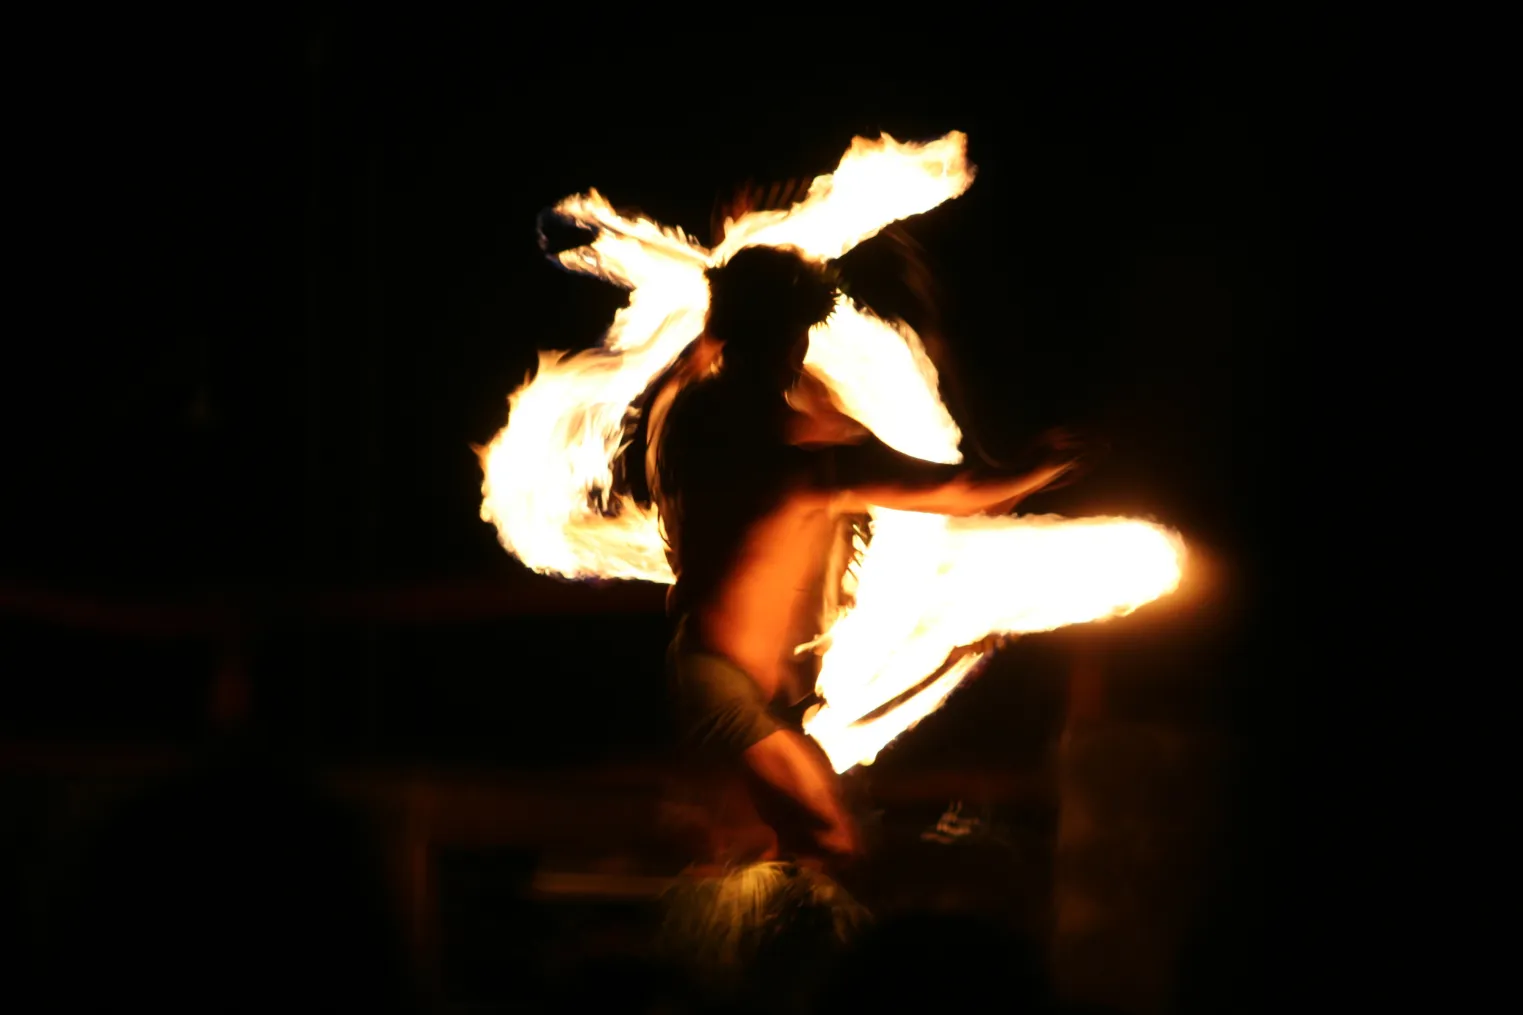
When the fire knife starts flashing through the dark, you’ll want a fast shutter around 1/1000 to 1/2000 sec so the spins and throws stay sharp instead of turning into a bright smear. You’ll also get stronger shots when you watch your angle and catch the flame against clean stage light, where the orange glow pops and the dancer’s shape stays clear. Set your camera to track movement, shoot in bursts, and follow the action like you’re keeping up with the fastest torch in Waikiki. For the sharpest results, dial in the best camera settings before the performance begins so you can focus on timing instead of fumbling in the dark.
Fast Shutter Settings
Lock in a fast shutter first, because fire knife dancers move like sparks in the wind and any hesitation turns that clean arc of flame into a blur.
- Set your shutter to at least 1/1000s to freeze a fire-knife spin. Jump to 1/2000 or 1/4000 for tosses and whip-fast rotations.
- Open up to f/2.8 to f/4, then raise ISO to 1600 to 3200 so the scene stays bright enough without inviting ugly blur or muddy shadows on skin.
- Use burst mode at 5 to 20 fps, and track the dancer’s torso with AF-C so focus sticks, not the flames.
- Pre-meter with spot or center-weighted metering and watch for finale spins or circle-of-fire throws. You’ll catch the sharp frame, the heat, and maybe your own grin.
At Mauka Warriors Luau, the Fire Knife Dance often builds to fast, dramatic moments, so staying ready between sequences helps you catch the cleanest peak action.
Best Firelight Angles
Fast settings help, but your angle matters just as much once the fire knife show starts. Stand near the front-row center as you descend into the luau grounds, especially in Mo’i Royal seating, and you’ll cut clutter from heads and torches. That cleaner sightline lets you fill the frame with the fire-knife performer and keep a quicker shutter speed under stage light. Start around 1/250s for mid-distance action and raise ISO to 800–3200, with f/2.8–f/4, if the flames dim. Pre-focus on the usual staging spot so autofocus doesn’t hunt at the loudest moment. Want elegant trails instead of mush? Use flash to freeze at 1/30–1/60s or pan gently at 1/60–1/125s while the fire paints warm ribbons across the tropical night air with confidence intact. If you’re arriving via the Waikiki shuttle, plan a little extra buffer so you can reach the luau grounds early and claim that front-row center angle before the show begins.
Track Spins And Throws
As the fire knife starts to whip through the dark, your job is to freeze the dancer, not chase the flame. Set 1/500s at minimum, though 1/1000s works better, and push ISO 1600 to 3200 when the stage dims. Since there is some walking involved at Mauka Warriors Luau, travel light so you can move quickly between viewing spots without tiring before the fire knife finale.
- Use continuous autofocus with one central or dynamic point. Track the torso or eyes, not the torch.
- Shoot burst mode at 8 to 20 fps. Watch the elbow extend, then fire as the release starts.
- Pick a 24 to 70mm or 70 to 200mm f/2.8 lens. Stay near f/2.8 to f/4 for sharp faces and mobile follow-focus.
- Stand slightly off-center at stage level. Front-row views help you catch knife spins, throws, and every fire-knife grin without background lights confusing focus.
Use Intermission for Luau Crowd Shots
Often, the best time for luau crowd shots comes during the short intermission about halfway through the show, usually when MC Cousin Jerry gives the cue and the grounds suddenly open up. Move fast, then use this cheat sheet:
| Spot | What you catch | Tip |
|---|---|---|
| imu revealing | Candid pork reactions | Arrive just before intermission |
| buffet line | Drinks, shave ice, chatter | Shoot beside the bar |
| shuttle pickup guests | Fresh mingling energy | Contrast later arrivals with early tables |
You’ll love tattoo station portraits.
End With Exit Photos and Cast Portraits
You’ll get your best exit path portraits if you move toward the pathway 5 to 10 minutes before the show ends and watch the front-left or front-right lanes as the cast steps down during the final applause. The timing matters, because this is when performers circulate for photos and the warm gold light after sunset makes faces glow while drums fade and skirts still swish past. Keep your camera ready with a higher ISO and wider aperture, then ask politely for a portrait near the tiki photo area if you want one last sharp shot before the night slips away.
Exit Path Portraits
Near the end of the night, stake out a spot by the small viewing area beside the imu pit for some of the luau’s best exit portraits. You’ll get dramatic exit photos with steam, fire glow, roasted-pig aroma, and cast members exiting close by.
- Arrive early and reserve a front-row spot along the wristband-designated path.
- Use a 50–85mm equivalent lens to frame faces and leis while keeping dancers behind them.
- Lean on warm tiki light after sunset. Try ISO 800–1600 with f/1.8–f/2.8, or night mode.
- Shoot when Cousin Jerry calls final shouts. You’ll catch smiles, quick waves, and those lively fire-reflections that make the walkway feel briefly cinematic. Keep your elbows tucked, leave a little headroom, and wait half a beat after each greeting so expressions settle into something natural nicely.
Cast Photo Timing
Once the finale starts, your photo timing matters as much as your lens choice. Secure a front-row spot near the stage so you can catch portraits of the fire-knife dancers and the nine-year-old performer before the applause fades.
As MC Cousin Jerry closes, move toward the stage exit for post-show shots. The cast was very warm during meet-and-greets, and they linger as guests drift toward the exit. If you can, stage gear by the exit pathway or souvenir area after check-in, or during intermission, so you’re ready for cast portraits with props and the 8-foot tiki statue. Bring a fast lens and bump ISO for crisp handheld frames. Always tip the cast for posed portraits. It’s good manners and earns bigger smiles from tired feet.
Final Night Lighting
As the encore winds down, the light gets surprisingly good for portraits. In the last 5 to 10 minutes, stage lights turn warm amber, spotlights sharpen faces, and your best exit photos begin.
- Claim a spot near the stage front or main exit walkway before the finale peaks.
- Use a 35 to 85mm lens, or portrait mode, set ISO 800 to 1600, and open to f/1.8 to f/2.8.
- Frame cast portraits with tiki statues, leis, or imu pit steam for extra atmosphere and a little drama.
- Thank performers, tip politely, and stay ready. Many will pause for quick posed shots as they pass, especially if you’re near the grounds descent. No flash. You’ll catch full costumes, easy smiles, and fewer elbows in the dark.
Frequently Asked Questions
Are Tripods or Monopods Allowed During the Luau?
Yes, but you’ll find tripods discouraged and monopods limited. Follow venue policy, declare any camera support at check-in, use compact options for crowd navigation, and rely on fast lenses or high ISO in low light.
Can I Bring a Drone for Aerial Photos?
Probably not, you’ll need a green light first. You must follow drone regulations, respect safety zones, show operator certification if required, and avoid no fly times, crowds, and sacred areas to keep things smooth onsite.
What Should I Wear to Photograph Comfortably All Evening?
Wear Breathable layers, Comfortable footwear, and a Light raincoat so you’ll stay cool, dry, and steady all evening. Add a Hands free bag for ID and gear, and skip jewelry so you won’t disrupt demos.
Are Smartphone Cameras Good Enough for Luau Photography?
Yes, smartphone shots shine: you’ll capture luau moments well if you use smartphone lighting wisely, switch to portrait settings for close-ups, rely on night stabilization after sunset, and choose wide lenses or 2x zoom thoughtfully.
What Happens to Photo Opportunities if It Rains?
If it rains, you’ll still get strong shots thanks to the luau’s rain contingency: you can use covered stages, adapt with lighting adjustments, avoid guest umbrellas, and shift to sheltered props, portraits, and indoor performances.
Conclusion
Arrive early, watch the light soften, and let the luau come to you. You’ll catch leis swinging, imu steam curling, and sunset gold on the tiki carvings before the crowd fills in. Then you can lock your settings, pick your angle, and freeze the fire knife in midair sparks. What’s the reward for a little planning? Photos that feel warm, alive, and a bit cinematic, with sand on your shoes and drums in your ears.